Background

Monday, April 11, 2011

Best of Spring...Part Two!

I am blown away by the inspiring ideas I found when I went huntig for ways to freshen up my home's decor for spring. Spring has sprung, love is in the air and the flowers are in bloom. Check out some of the neat ideas that I am going to recreate for my home!

Chevron Crush...

Like Amanda from Dixie Delights and so many others in the design world....I have a total crush on Chevron. No not the gas station, the zig zag pattern seen in textile design. It truly is as haute as Subway Art. My problem is that my home is very transitional in design and filled with treasures from our travels, mostly European. How do I mix some Chevron in as most of what i am seeing is in vibrants. I was blown away by Amanda's subtle contrast with silver and gray in her bar....love it!!! I am thinking...laundry room.


Easter Bunny Silhouettes..


Emily, an interior designer from Fireside Studio created this fantastic silhouette to hang on her gallery wall. I love the whole project. Check it out! This is so on trend with the use of silhouettes in design on all spectrums. I love it!

Paper Magnolia Wreath...So Fresh


I have to say this is the most origianl idea I have seen in a long time. How beautiful is this wreath. And living in SE Texas, the magnolias bloom. I love taking elements of nature into my home. Craftberry Bush gives a complete tutorial on her blog on how to create this masterpiece. This is a great sit down on Sunday with my sweet princess and bond type of craft. I am excited to do this with my princess.

Spring Has Sprung Monograms


Kaitlyn at The Goodey Knot created these gorgeous sprouting monograms for her nieces. I love the idea of being able to incorporate this fun design through my kids spaces. Lovely!

Well that's my list of To Do's. I am going to be one busy girl and I can't wait to get cracking! I hope you have found some great ideas to inspire you as well. Cheers!

Sunday, April 10, 2011

Some of My Favorite Ideas For Spring...

I love the freshness of Spring. It is a season of new beginnings from all standpoints both physically, mentally and spiritually. We come out of the Winter solace and give our spaces a good clean, celebrate the return of color to naturescape, relish in the new arrivals. And most importantly bring in a whole new color pallette into our homes.

So...in the spirit of spring and the desire to freshen up my tired home...I did what I always do and went through my favorite blogs and linky parties looking for the very best ideas that I would like to bookmark and add to my To Do list.

Today, I thought I would share some of them with you too!


How fantastic is this Spring sign from Creative Try Alls?? I love the font she used and the moss is so on trend for how top designers are incorporating natural elements into their spaces. Go to the link for the full tutorial on how to make this beautiful project. The best part is..it was almost all recycled materials and creativity!

Button Easter Eggs

How beautiful are these eggs and so creative. Something Creative Everyday made these gorgeous eggs out of items that she thrifted. I also love the reclycled candleabra (not pictured) that she made in another post to display decorated eggs in. These are on my list to make!

I Love Pennants and Burlap...Tan and Black...the new Pink and Yellow.


So While My Sailor's Aweigh created this gorgeous, simple, natural pennant to celebrate spring. If you like a look that encompasses Spring without all of the pastels...this is for you!

Easy Spring Wreath...with feathers..oh la la!


Kathie's Like a Box of Chocolates created this beautiful wreath that again, encompasses the natural elements of the eggs in the nest trend that is so hot right now. Once I read her tutorial, I am so excited to created this for my home as it looks so easy and affordable despite it's uber chic appearance. Love it!

Nest Specimen Art...fabulous!!!


Midwestern Sewing Girl created this beautiful wall art for the season. She created simple burlap rosettes to symbolize nest and attached three eggs to one for interest. I love this. I am going to create this to go with my bird in the nest tablescape in my formal dining room.

I hope you have been as inspired as I have been! Stay tuned for part two of my Favorites for Spring feature!

Saturday, April 9, 2011

Turn Your Scrapbook Pages into Wearable Art!!!

Good Afternoon! I am very blessed to be the mother of a beautiful daughter and wonderful son. It is easy to say that my kids are my world. With that blessing comes the challenge of raising two very different individuals and making their activities a family affair that everyone enjoys...

My son is the ultimate athlete. He loves all sports and baseball is his passion...We play baseball three days a week, 9 to 10 months out of the year and we are all involved. Mr. Bohlen, after a couple of seasons as Assistant Coach is now the Head Coach of our team. I am a busy dugout mom. This is how I spend so many of my days...

That being said, my daughter is the consumate girly girl. The princess. I have no idea where she gets it....lol. She dutifully, without ever complaining accompanies us to many nights of baseball...(don't feel sorry for her. She has a very full dance card of her own.) From the day she was born she was always happy to be wherever her brother was. She is his number one fan!
Being the fashionista that she is...she pointed out that we all had shirts for our team. Will had a Coaches jersey, I had a team t-shirt as the team mom. She wanted to have a Go Keaton shirt. This got my wheels turning....

Since I created the team's banner with a digital scrapbook page of the boys, blew it up at the local printer and laminated it and it worked out really well, why couldn't I do the same with a t-shirt????

So I got online and using a template from a local designer called Binty's Baseball Kit, I found my favorite pictures of Keaton playing baseball and added some beautiful pink paper and the message that she wanted to share with the world on her shirt on a 12x12 digital scrapbook page.

If you are a paper scrapper, you can scan the page you would like to use into a PDF or JPEG and create a digital image to use for your shirt. If you do not have a scanner that will scan 12x12, you local Office Max will scan it for you for about $1.00.

Then I went to my local Michaels and picked up Wilton's Photo Transfer Sheets for an Inkjet printer. It is important to know what your shirt you are going to use so that you can determine if you need to purchase a dark or light colored transfer.

Load your transfer paper into your printer with the dark blue line facing the proper direction. I then reduced my image to an 8x8 size of choose Fit to Paper in the printing menu so that your image fits on one sheet. For light colored shirts you need to click the Print in Reverse option on your print screen.

Heat your iron to the Cotton Setting without steam and place your shirt on a hard surface to iron. Do not use an ironing board. Peel the design from the backing paper and place the design on your shirt. Place the enclosed parchment paper between the iron and your design and place your iron on your desing and hold for 20 seconds on each section to adhere the design to your shirt.

Now, being that my little fashionista loves her clothes to sparkle as bright as her personality, I decided to girly it up by adding some bling...

So I was able to pick up a Rhinestone Heater setter for $12.00 and some lovely red and clear rhinestones and I embellished the frames of the photos on my page for dimension and gave it some sparkle.

This was a very simple process and I am excited by all of the endless possibilities for this tool. Simply pick the right size of tip for your tool depending on the size of your rhinestone. Let it heat up for 10 minutes and begin your application.

Using the enclosed tweezers I place each rhinestone where I wanted it on my design and then placed the heat tool gently on the stone to set it.


It took me about 30 to 45 minutes to adhere all 200 stones to the shirt. But in the end she was beyond happy with the final product.


And she found her perfect role on our team the first day she wore it...Ball Girl. Everyone loved watcheing her run across the field in her shirt to collect the bats after the boys hit.

I can only imagine the possibilties for this...family reunions, class trips, Girl Scouts....You can do it too!

Friday, April 8, 2011

Fantastic Easter Basket Cupcakes...I am going to use these as placecard holders

All I can say is FABULOUS! I found these on Disney's Family Fun Magazine. What a great way to dress up your Easter Dinner table and make each guest feel special. I have incorporated the whole natural element of the birds and the nest in my Spring Table decor that will take my table from Easter all the way through to Summer. These cupcakes are the perfect extra touch!
Ingredients


1 dozen cupcakes

1 bag jelly beans

2 cups white icing

Sweetened coconut, colored with green food coloring


Instructions

First, frost the cupcakes with white icing. Bend a pipe cleaner or a piece of red licorice into an arch and push the ends into the sides of each cupcake.


Shake the shredded coconut in a stainless steel bowl. Sprinkle on food coloring bit by bit, mixing vigorously to distribute the color


Place a pinch of shredded coconut on each iced cupcake. Now place three jelly beans on the "nest" of coconut.


Tie a small ribbon bow on the pipe cleaner or licorice handle at a jaunty angle.


Put one cupcake basket by each place setting at Easter brunch or give them as gifts


Friday, March 18, 2011

Blog Hops and Parties....One Stop Sources for Inspiration

I am often asked, "Where did you get that idea?" or "How on earth did you do that?". Honestly, I am a serial recycler of all things creative. I learned through my fantastic Bethany Baptist MOPS mom friends that women are so diverse in their talents and when you bring a collective group of us together we can create amazing things. Whether it be a mood to a meeting, the vibe of a party, a great meal, a wonderful recipe. The year I was Coordinator my wonderful blessed friend Melissa politely suggested that I let her do all of the baking. She is a master! She is one of those rare beautiful souls that can both bake and cook mouth watering items. And she is right, she is far better than I in the culinary arts. It was her gift. My friend Stella, was the ambiance queen! She could make any room ooze with elegance and make any mother feel like she had escaped into a tranquil retreat for a couple of hours. My friend Heather has the gift of sweet presence. She loved you through cards, gifts, a good laugh. She was always looking out for the one who was in need of encouragement and came up with the most creative ways to do so.

When I moved overseas all of these fantastic women loved me in their special ways from afar. But I was missing the inspiration I drew from them through our chats over coffee. In this, I found the gift of Blogs.

I found myself drawn to the inspiration posted by these amazing women. I had a new source of inspiration for my creative recycling. I was drawn to those that hosted Link Up parties. It was one stop creative shopping. My favorite was the Weekend Wrap Up by Jen at Tatertots and Jello. It was huge. She often has several hundred creative projects posted to her party every week. I found great ideas and added them to my favorites and came back to them later.

Often I found that I was coming back to my new favorite blogs for inspiration and began "following" them. And now I have wonderful circle of creative women that I have seen transform their homes, families and make every Holiday special.

I would encourage you to look to the sidebar of my blog. I have buttons to my favorites ready for you to click on. Take a look at these great blogs for the chance to be inspired!!! This week I am adding a new one...check it out!

Smart and Trendy Moms

Thursday, March 17, 2011

Happy St Patricks Day

This year we really got into the spirit of this fun holiday that often goes by in a flash. We decorated our table setting. Mr. Bohlen brought home a fresh shamrock plant for the kitchen. The Mom Squad, as I affectionately refer to the greatest group of moms in Katy, TX that I am blessed to call friends and I were having coffee the other morning and since our fearless Girl Scout Troop leader was going to be at the Rodeo for our meeting, we planned a St Patrick's Day themed meeting. We had the girls make the most adorable Blarney Stone and read the Legend of the Blarney to them. the girls were hooked. Jen collected some river rocks out of her garden and we had the girls dip their finger in glue and stamp out the shape of a shamrock. They coated their shamrock in green glitter and Bam! They had a cute Blarney Stone.
To Catch a Leprechaun Hat
Next we had the girls make a Leprechaun Trap. We told the girls about the Legend of the Leprechaun. And since they are curious, we decided to build a trap to lure them to find the gold at the end of the rainbow. We found this fun idea here Disney Family Fun. The girls had such a great time putting together their traps and scheming ideas as to where to set them up.
We provided the moms with chocolate gold coins to place in the traps from time to time and on St Patricks Day. My daughter checked her trap constantly and was so excited whenever she found her gold coins.
Which brings us to this morning. I welcomed the family to get into the St Patricks Day spirit with rainbow pancakes that I found at Tablespoon.com. The recipe calls to place your rainbow fruit skewers across the top of your pancakes, but my skewers were too heavy to stand and I wanted to incorporate clouds and a Shamrock and gold Coin into my design. The kids LOVED them. These could really be used to brighten any day!
So I will incorporate these colorful rainbow skewers into our lunch or dinner to keep the celebration alive and read the Story of the Shamrock.

Are you short on time today? Are you on the run? Looking for a fun way to get out of the house on Spring Break? Chic Fil A is serving green ice cream and lemonade today! Happy St Patrick's Day!

Wednesday, March 2, 2011

Whoopdwhoop!!! It's Awesome!

I know so many talented creative people that really have their niche and maybe admirethe creative vision of others in other mediums. I have found the perfect answer. Whoopdwhoop

What is the Whoopdwhoop about Whoopdwhoop....well it was the creators vision to create a community where artisans could share their talents, creativeness and creations with others not through money, but through swapping. We wanted a place where people could list their handiwork (photography, paper crafts, jewelry, art, sewn items, basically anything that they have handmade) and then swap them for other's handmade items- completely eliminating the need for money.


It was this idea that sparked the life of whoopdwhoop.com. Whoopdwhoop is a unique, currency free marketplace where individuals can both list their creative endeavors and 'shop' for other's creative endeavors- all without the use of money. Points (whoops) are earned by both listing and swapping your handiwork. You can then take the whoops that you have earned and 'shop' within the whoopdwhoop community. It's the perfect way to partake in some retail therapy and not feel guilty! It's free, it's easy, and it's fun.

Whoop it up with whoopdwhoop!

Tuesday, March 1, 2011

Becoming Obsessed with Molding

Since taking some time off of work, I have been finally inspired to turn our beautiful house into a home. Mr. Bohlen worked with the builder to pull together all of the big picture elements of our home and together we poured through catalogs and websites to add the finishes. When it was all pulled togther we moved in...and it sat as it was...and sat, and sat...for almost four years...

Mr Bohlen was perplexed, we have remodeled two homes in the Seattle Area and turned what once had good bones and in need of lots of love into masterpieces. Like the father in My Big Fat Greek Wedding who thought that everything could be fixed with a good squirt of Windex, I thought that all of the world's problems could be solved with a good coat of paint. So why wasn't I painting?

I had this beautiful home and wanted to do it just right...perfect and could not commit to the perfect design plan. Well the time came that my son needed a new bed and so I emptied his room and the painting began. Mr. Bohlen rejoiced!!! More on that to come.

Now that I have his room in motion, I am thinking about what to do next. I think my new mantra is nothing makes a space more grand than molding. I have been gushing over my friend Jen's recessed full panel walls that she has painted a celery green in her restored tutor. And it got me looking through Blogland for some inspriration and I thought I would share these wonderful ideas with all of you!

I am still looking for inspiration. Please share your ideas on how to use molding or spaces that you have decoarted and I will feature your ideas here!

Here is the Accidental Molding Masterpiece from Ladybird Lane
 

My next stop was Tidbits from Treymane...all  I can say is wow!!! I had to read through all of her archives. A-M-A-Z-I-N-G!!! I am actually going to attempt her pantry redo in my home as my pantry sits out in the middle of the walkway in plain view and could use some wow factor.

Here is her inspiration from AD...


Here is her pantry before. It is alot like mine where it sits in the main through fare. They say the hearth is the heart of the home...but I am thinking that the pantry really is, given where they are built.


And viola!!! Here is the after...


Next stop is a great example of the Bead and Batten style with It's the Little Things that Make a House a Home


Isn't her family room so welcoming and gorgeous!!! Here is a couple of detail shots of the same room.


And another...
And here is some inspiration from a focal wall turned into an Alphabet Wall by Girl in the Air
Before


And after...

Friday, February 25, 2011

St Patrick's Day Fun!


I think that creating traditions in your home is a great way to enhance the connectivity and balance in your family especially when you are trying to juggle the fine line of work/life balance. Days seem to fade into weeks and time flies by.

Decorating for holidays is a great way to start. Many of us decorate for the major holidays, but there are some fun ones in between. This year since there is such a gap between Valentine's Day and Easter, I decided to take on a little St Patrick's Day fun to pay homage to my Celtic heritage.

So, start small. pick one room that is seen and enjoyed. For my house that is my formal dining room. This room is visible from the street throught he window and is the first room that you see in my home when you enter along with my husbands office. They say your home makes a statement about your life. What do I want my home to say about the Bohlens.

Well if you look in Mr. Bohlen's office it is very obvious that we enjoy sports and the outdoors and that he works, very, very hard. If you look to our dining room you see our St. Patricks Day setting. It says this is a family that celebrates life's forgotten moments, that knows how to have fun, has a sense of tradition and whimsy....what are you doing to celebrate St Patricks? What traditions do you mark with your family? What does your house say about you?

Tuesday, January 11, 2011

It's Girl Scout Cookie Time...Here Are Some Great Recipes

It's that time of year again....Girl Scout Cookies are on sale and I am sure by now you have had the opportunity to be approached by a darling girl like the precious blond pictured with me below with a request to support her troop and order some cookies. If you haven't...I can help you with that. Simply click here Buy Cookies Now! . Simply fill in your contact info in place of mine and you are set. Do cookies crimp your diet and fitness goals? Consider donating to the KCM Food Pantry where the girls volunteer. Remember, they freeze for up to a year!


Girl Scout Collage
Ever wonder what all of those precious girls do with the money they raise. I put together a little collage of what amazing things my daughter's Daisy Scout Troop did this year...They went to a week of Music, Drama and Art Camp, attended two University of Houston sporting events, went roller skating, had Tea With Mrs Claus and donated time, food and money to our favorite charity, Katy Christian Ministries Food Pantry. The girls earned badges, made friends and grew as young ladies.


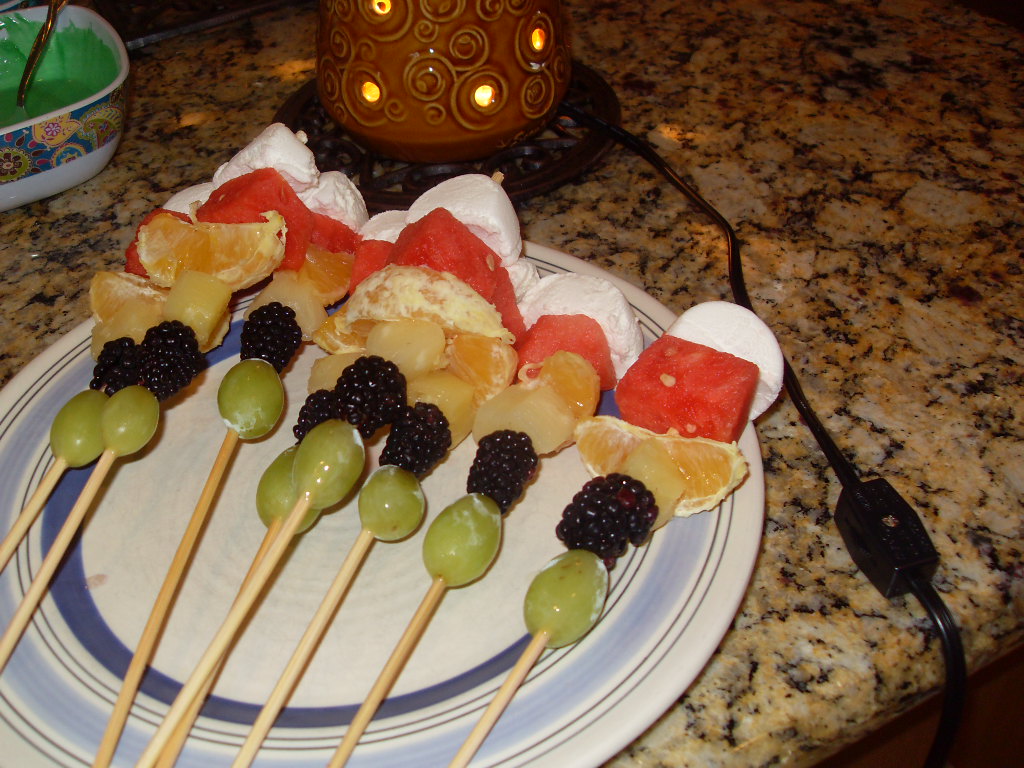
So, once you get your cookies. Get creative and try out some of these scrumptious recipes. P.S. They are not just for dessert!

Thai Peanut Chicken 
    Ingredients
    8 crushed Peanut Butter Sandwich® Girl Scout Cookies
    2 pounds boneless, skinless chicken tenderloins
    Teriyaki glaze
    1 box of Pad Thai Noodles
    Thai Peanut Sauce
    Wood skewers
Directions
1. Grill chicken tenderloins on wood skewers, brushing occasionally with Teriyaki glaze. 2. Prepare Pad Thai noodles according to directions on box. 3. Serve chicken tenderloins with four crushed Peanut Butter Sandwhich® cookies sprinkled on top.4. Mix remaining Peanut Butter Sandwhich® cookie crumbs with peanut sauce. 5. Pour peanut sauce over chicken and noodles, or serve as a side dipping sauce.
Yields 4 servings
 

 Carmel Delight Shrimp
 
Ingredients
5 extra-large shrimp, peeled and de-veined
5 Carmel Delight® Girl Scout Cookies®, finely chopped
2 cups seasoned bread crumbs
2 cups flour
1 cup coconut flakes
4 egg whites
1 pinch cayenne pepper
1 lime for garnish
Vegetable or peanut oil for frying


Directions


1. Toss coconut flakes with bread crumbs, cayenne pepper and chopped Carmel Delight®

Girl Scout Cookies®. 2. Dredge shrimp through fl our, followed by egg whites and Carmel Delight® Girl Scout Cookies® mixture. 3. Fry shrimp in vegetable oil at 350 degrees until golden brown. 4. Garnish with coconut flakes and lime wedges. Yields 5 shrimp


Serving Suggestions:
• Serve warm. • Arrange in a star pattern on a salad plate, or on a bamboo skewer with tropical fruits. • Can be served as an appetizer, in a salad, or as an entrée. • If serving as an entrée accompany with fried plantains and wild rice.


Shortbread Cheesecake Cup


Ingredients
1 box of Shortbread Girl Scout Cookies
Instant cheesecake pudding mix (check the box for extra ingredients)
12 oz. Cream cheese (softened)
Strawberries
Chocolate syrup

 
Directions
1. Crush half box of Shortbread Cookies. Mix softened cream cheese and cheesecake pudding until smooth. 2.Layer crushed cookies and cheesecake pudding in a cup and layering of ingredients. 3. Garnish with strawberries (or your favorite berries) and 2 full Shortbread cookies. Drizzle with chocolate syrup.
Yields 8 servings
 
Peanut Butter Pattie Milkshake

Ingredients
½ box of Peanut Butter Pattie® Girl Scout Cookies
6 cups of vanilla ice cream
1 cup of milk
1 can of whipped cream

 
Directions
1. Mix cookies, ice cream and milk in blender. Blend until desired thickness. 2. Serve in tall milk shake glass and top with whipped cream. Garnish with crumbled cookies. Yields 2 servings.


CARAMELIZED PEAR AND NUTTY-COOKIE CRUNCH SUNDAE


Ingredients:
8 Shout Outs! Girl Scout Cookies
1/3 cup chopped pecans
2 tablespoons butter
1/4 cup packed light brown sugar
2 ripe, but slightly firm pears, cored and cut into 1/2-inch pieces
Vanilla ice cream
Garnish: 4 Shout Outs! Girl Scout Cookies

 
Instructions:

 Place 8 Shout Outs! cookies in a large self-sealing plastic bag and close. Place bag on cutting board and use rolling pin to crush cookies into coarse crumbs. In a small bowl combine cookie crumbs with pecans; set aside. To make caramelized pears, melt butter in a medium frying pan over medium to medium-low heat. When butter foams, sprinkle the brown sugar over top. Cook until sugar is dissolved, about 3 minutes. Add pear pieces and cook over medium-low heat, stirring occasionally. Cook approximately 4 to 5 minutes or until the sauce is caramelized and the pears start to break down. To make sundaes place half of nutty-cookie crunch in bottom of each serving dish. Scoop ice cream over the nutty-cookie crunch. Top with warm pear sauce and sprinkle with remaining nutty-cookie crunch. To serve, place one Shout Out! on top of each sundae.

 Makes:4 servings

 Submitted By: ABC Bakers

Chocolate Thin Mint Pizza Supreme


Ingredients:
1 pkg. (18 oz.) refrigerated chocolate chunk cookie dough
1/2 pkg. (19 cookies) Girl Scout Thin Mints
1/2 cup white chocolate morsels
Vanilla ice cream, optional

 
Instructions:

Press cookie dough evenly in the bottom of an ungreased 12-inch pizza pan or a 13x9x2-inch baking pan. (Dough will barely cover the pan.) Break Thin Mints into halves or thirds; press cookie pieces into dough, covering evenly. Bake at 350 degrees for 12 to 18 minutes or until golden brown. Place white chocolate morsels into a small self-closing bag. Microwave the bag of morsels on MEDIUM HIGH (70% power) for 40 to 50 seconds or until melted. Snip one corner (about 1/8 inch) off the bottom of the bag. Hold bag tightly at top and drizzle white chocolate stripes over top of pizza. When cool, cut pizza into 8 or 10 wedges. If desired, top each serving with a scoop of ice cream.

Makes:8 to 10 servings

Submitted By: ABC Bakers

Chocolate Thanks-A-Lot™ Éclair


 Ingredients:
1 package Thanks-A-Lot™cookies
1 (3.4 ounce) package instant vanilla pudding mix
1 1/2 cups milk
1/2 (8 ounce) container frozen whipped topping, thawed
1 (16 ounce) package prepared chocolate frosting

 
Instructions:
Line the bottom of an 8-inch round cake pan with Thanks-A-Lot™ cookies. In a large bowl, combine pudding mix and milk. Stir well. Stir in whipped topping to pudding mixture. Spread half of mixture over cookie layer. Top with another layer of Thanks-A-Lot™ cookies and the remaining pudding. Top all with a final layer of Thanks-A-Lot™ cookies and frost with chocolate frosting. Refrigerate until serving.

 
Makes:6 to 8 servings

Submitted By: ABC Bakers


Friday, January 7, 2011

Valentines Smores and a Freebie!

I cannot wait to make these. I was cruising through the grocery store today when I saw bags of fluffy, big pink marshmallows and thought what on earth could be done with them....They shouted happiness to me. Then I found my inspiration over at Trillustrations....Valentines Day Smores!

We take great joy in SE Texas in the winter of really enjoying outdoor living with the crisp air and a warm fire. Simply take a bag add a graham cracker, your favorite chocolate and one of my pink fluffy marshmallows and you have a truly unique Valentine. Click on the link above to get your bag toppers free!


Thursday, January 6, 2011

Owl Always Love You...The Cutest Valentine Decor and a Freebie


I cannot wait to hang this fresh and sweet print in my home. I found this on It's a Crafty Life. Click on the link to get your copy.

She was inspired by a Beatles song. But the quote she used originated from a love letter sent from Robert Browning to Elizabeth Barrett Browning. My parents had a stained glass version of the quote for years. Don't you just love the idea of love letters?

I may print it and attach a love letter of my own to my betrothed. How romantic. But in terms of decor the sweet owls in this print are totally on trend and will make a statement no matter where you choose to place them.

We decorate to celebrate so many occasions. How often to we really openly celebrate one of life's greatest gifts...love. In the age of throw away relationships. What would it mean to our children to make Valentine's Day not a Hallmark Holiday, but one of a true homespun celebration of our love for one another....

How will you celebrate your love this season. Post a comment and share your ideas...

Bottle Cap Jewelry...Hot Trend in Girls Fashion=Sleepover Fun!


Meet the Girls...Lizzy, my daughter Payton and her puppy, Chloe. These angels were such a delight to sit down and make Bottle Cap Jewelry with. Their eyes lit up as I pulled out the earing clips and wires. They gasped as they saw pretty papers and charms and gems that I had stored. They dug in to the key chans and necklaces. These 7 year old darlings sat for two hours and happily worked on their creations.

Making them is so simple! I found all of my supplies at Hobby Lobby and Micheals who each have their jewelry items on sale for 50-60% right now. We made earrings for about $.30. That is a deal for such great sleepover entertainment. Here is how they are made:

Supplies:
Bottle Caps (Hobby Lobby had predrilled with jump rings attached)
Magic Glos, Diamond Glaze or Modge Podge Multi Dimensional (I used Magic Gloss)
Pretty Scrap Paper
White Glue
Fun items, charms, beads etc.
1in punch (not neccessary as bottle caps come with template, but nice as it cuts clean)
Supplies to finish.


Directions:

Cut the pretty paper of your choice to fit the inside of your bottle cap.
Glue the paper to the bottom of the cap using white glue
Add gems, charms, beads to your liking inside the cap. Don't worry about gluing them we will get there.
Once your design is set fill the cap with Magic Gloss. Once the Magic gloss sets into a resin, you design will be captured.
Let dry and finish with earings, necklace chain, ribbon or magnets....

Such great fun!

Tuesday, January 4, 2011

Just One Pound...A Fresh Approach to the Same Resolution...

This was a gift given to me by one of the most inspiring women I know...my high school glory days friend, Christine Adams. A couple of years ago she decided it was time...time to make a change for health. She included exercise, joined Weight Watchers and surrounded herself with a great community of supporters.


Christine Before and After


Today, She looks amazing...but the amazing transformation didn't just come in the physical health benefits that her quest brought her, but her spirit was transformed. She went on to inspire people all over the world through her commitment, her Facebook page and everywhere she went to make a change for themselves. She is truly an inspiration to many including myself, even today.


Christine went from walking down the block to a Marathon Maniac, completing 10+ full marathons last year. She is amazing and gave me advice on how to get on my journey to completing a couple of 5k's of my own last year. This year I resolve to lose and average of a pound a week, finish one 5k a month and log 10,000 steps a day on my pedometer.

What are your goals in regards to health and fitness this year. Is it the same old "Lose Weight" that we add to the list every year? In my career, I have moments to advise about strategic planning and setting goals. "Your goals must be SMART...Specific, Measureable, Attainable, Realistic and Timely..."  I would coach. Last year was the first year I really applied this to what I wanted to accomplish in my own areas that I had created 2010 Resolutions....and come July, it dawned on me if I did not start running, I was not going to make my goal of completing the 5k... Since I got myself on track, I was able to complete a couple of 5k's. What are your goals this year? Are they SMART?

In true, Christine style, she sent this Just One Pound.... it is SMART....It inspired me....It is included below....


If You Lost just 1 Lb. Each Week of 2011


By Valentine’s Day
You’d be 7 lbs. lighter and loving it!


By St. Patrick’s Day
You’d be 11 lbs. lighter. With the luck-o-the-Irish You’ll make my goal.


By Easter
You’d be 16 lbs. lighter. You’d be a cuter bunny.

By Memorial Day
You’d be 23 lbs. lighter. You won’t let it rain on your parade.


By Flag Day
You’d be 25 lbs. lighter.


By Independence Day
You’d be 27 lbs. lighter. That’s a neat Declaration of Independence from overeating!


By Labor Day
You’d be 36 lbs. lighter. What a wonderful reward for all your hard work.


By Columbus Day
You’d be 41 lbs. lighter. What a joy to discover what you can do.


By Halloween
You’d be 44 lbs. lighter. You'd didn’t think you had a ghost of a chance.


By Thanksgiving
You’d be 47 lbs. lighter. You’d have so much to be thankful for.


By Christmas Eve
You’d be 51 lbs. lighter. Talk about being merry!


By New Year’s Eve
You’d be 52 lbs. lighter. It’s not just a new year, it’s a new You!


.

I Have Found the Gem...